
Tuesday, August 11, 2015
Wednesday, August 5, 2015
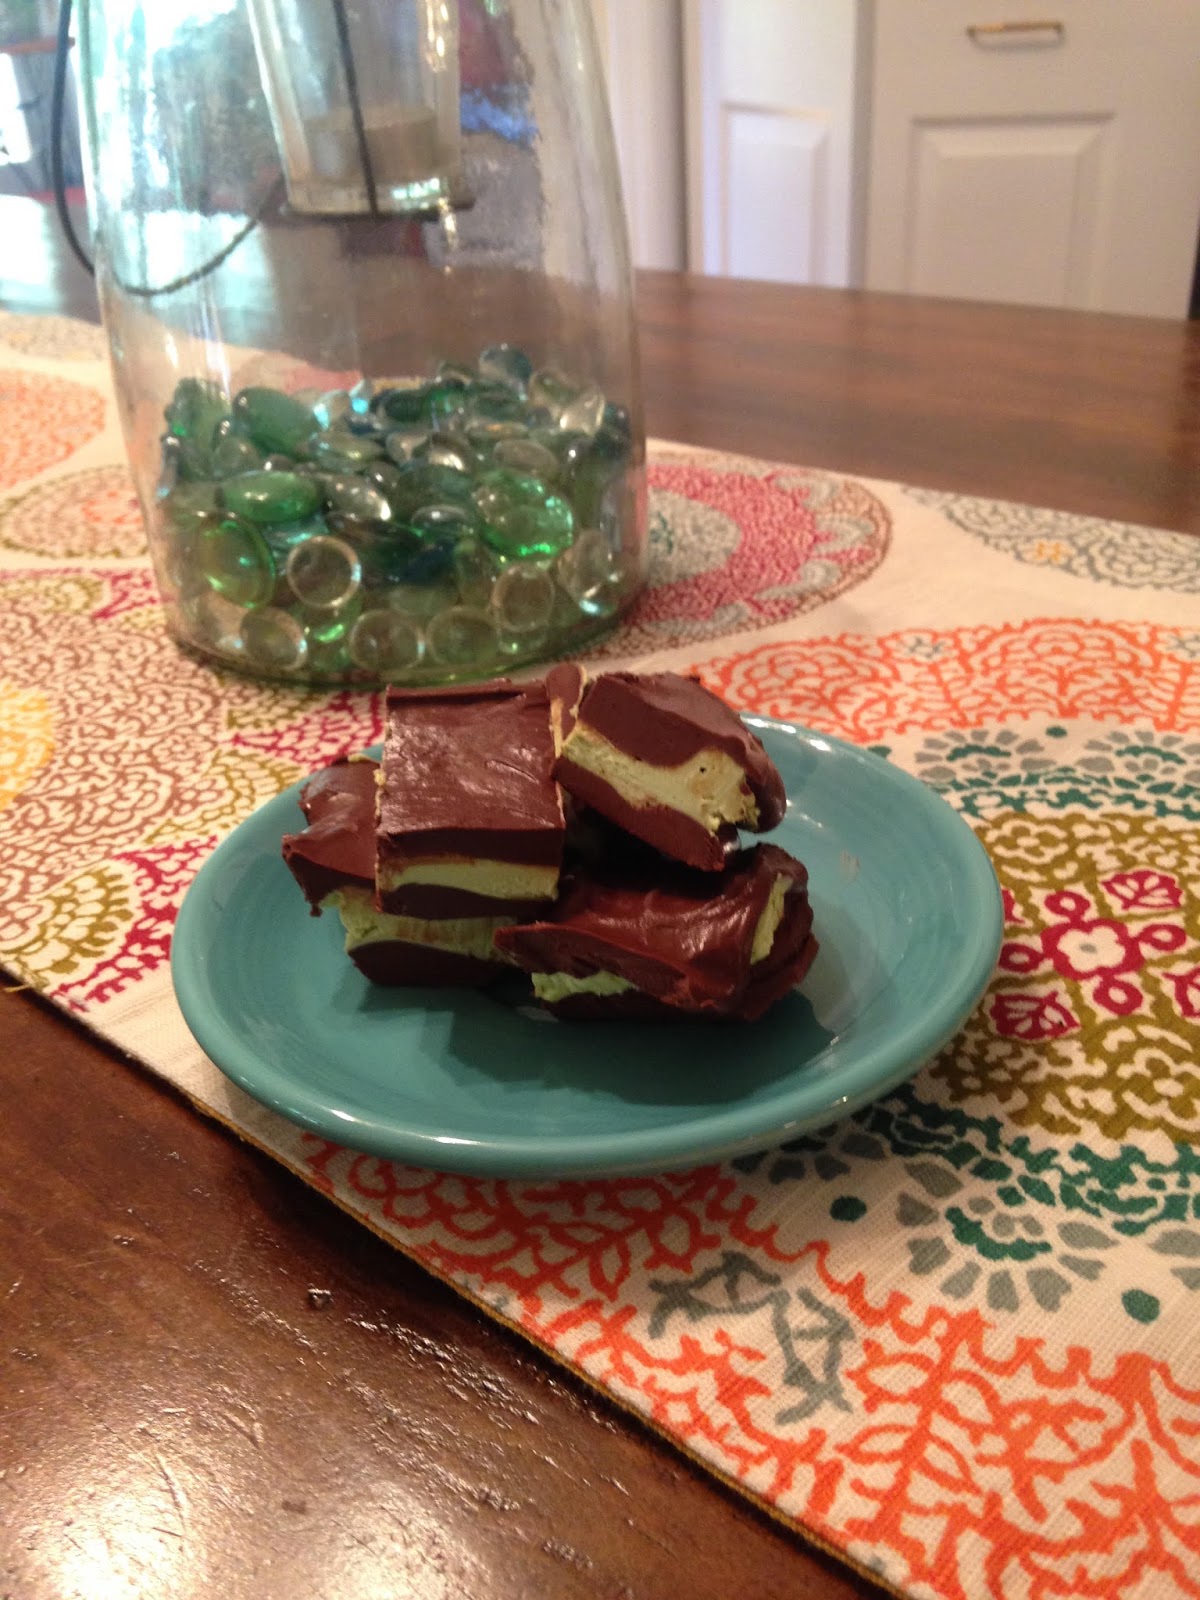
Mint Fudge
- 1 1/4 cup heavy cream
- 3 Tbs + 1 tsp THM Gentle Sweet (you can substitute whatever sweetener you want... gentle sweet is what I used)
- 1/2 tsp vanilla extract
- 6 ounces unsweetened chocolate, chopped
- 8 ounces cream cheese, softened
- 1 Tbs + 1 tsp THM Gentle Sweet
- 2 Tbs heavy cream
- 1 1/2 tsp mint extract
- 1 tsp matcha powder (this is optional, but it is what turns the mint part green, so I always use it.)
2) In a small saucepan, whisk together cream and sweetener over medium heat. Bring to just a boil, then remove from heat. Stir in vanilla extract.
3) Add chopped chocolate and let sit for a few minutes until the chocolate is melted completely, then whisk until smooth.

4) Pour half of this chocolate mixture into the prepared pans and spread evenly to the edges. Transfer to the freezer for about 20 minutes to firm up. Put a lid on the remaining chocolate so that it stays warm.
5) To make the mint layer, beat cream cheese, sweetener, cream, mint extract and matcha powder together until smooth.

6) Spread over the first chocolate layer evenly, smoothing to the edges.
7) Top with remaining chocolate, spreading evenly to the edges. Put back into the freezer until set.
8) Remove from freezer and cut into squares. Enjoy!
Note: I originally found this recipe at All Day I Dream About Food. (I love this blog, btw!) As with almost every recipe I ever make, I did make a few changes to it.
Tuesday, August 4, 2015
A New Series: A Quote for Tuesday
Hi everyone!
Today I am beginning a new series on the blog. Every Tuesday I will post a cooking quote. I have this thing for quotes, so I thought I'd share some!! If you have a favorite cooking quote, share it in the comments!!
So, with no further adieu, here's today's quote:

Today I am beginning a new series on the blog. Every Tuesday I will post a cooking quote. I have this thing for quotes, so I thought I'd share some!! If you have a favorite cooking quote, share it in the comments!!
So, with no further adieu, here's today's quote:

Saturday, March 7, 2015
THM Mini Cheesecakes
- 2 (8-ounce) packages of cream cheese, softened
- 2 eggs
- 10 teaspoons Truvia
- Squirt of vanilla extract
- Juice of 1/2 lemon or two squirts of lemon concentrate
Preheat oven to 350 degrees and put muffin cup liners into muffin tins.
Mix all ingredients in a bowl with an electric mixer until smooth. Pour into muffin tins and smooth the tops. Put cheesecakes in the oven and bake for about 30 minutes (depends on your oven - might take a little more or less time).
While the cheesecakes are baking, mix up the chocolate whipped cream. Beat 1 cup of heavy cream until it is the consistency and thickness of whipped cream. Melt half a cup of dark chocolate chips (I used Lily's Dark Chocolate Chips) in a saucepan. You may want to add a splash or two of cream to the melted chocolate to thin it a little bit. Do this while it is still on the heat though, or it will just thicken immediately. Add the melted chocolate to the whipped cream and beat with mixer.
When the cheesecakes are done cooking, let them cool on a wire rack before putting the topping on. If you do it right away, the cream will just melt. Once they are cooled, spread the whipped cream on top. You can also pour a little berry puree on top of the whipped cream.
Now all you have to do is take a big bite! Be careful though, they are addictive! They're THM though, so who cares, right?!

P.S. While these are healthy, they don't taste healthy. Promise.
Tuesday, September 30, 2014
My Favorite Sauteed Veggies
Recently, I've really been enjoying sauteed veggies. I'm sure most people know how to saute vegetables, but here is one of my favorite combinations.
Melt some butter in a skillet and add in all the vegetables. I often let the onions and garlic cook for a minute or two before adding everything else. Usually, I'm in a hurry when I make these, so I just chop as I go. If this is the case, and you aren't adding everything at the same time, I would add them in this order: onions, garlic, bell pepper, squash, and, lastly, mushrooms. Add salt and pepper, if needed. Let the veggies cook until tender. Serve and enjoy!!!
- Butter (if you are dairy free, you can use coconut oil)
- Onion
- Garlic
- Bell Pepper
- Summer Squash (and/or zucchini)
- Mushrooms
- Salt and pepper
Melt some butter in a skillet and add in all the vegetables. I often let the onions and garlic cook for a minute or two before adding everything else. Usually, I'm in a hurry when I make these, so I just chop as I go. If this is the case, and you aren't adding everything at the same time, I would add them in this order: onions, garlic, bell pepper, squash, and, lastly, mushrooms. Add salt and pepper, if needed. Let the veggies cook until tender. Serve and enjoy!!!
Friday, September 12, 2014
THM Chocolate Lasagna - S
Recently, I saw a very yummy looking recipe for Chocolate Lasagna. I decided to make a THM version and share it with you! It takes quite awhile to make, but it's worth it!
To begin this recipe you need to make a double batch of THM oreos. I used this recipe, but there may be other ones out there. Basically, you need around 36 oreos. You may have a few extras, which you can always eat. ;) I found that these oreos worked better for the Chocolate Lasagna if you make them a day or two in advance and put them in the refrigerator. They do work the same day though.

The next step is to make the pudding. I used the Choco Pudding recipe from the Trim Healthy Mama book and then added some chocolate syrup to it. Don't use the whole recipe for this part, just add some to taste. It makes the pudding a little more chocolatey than the original recipe.

While your pudding is in the refrigerator, you need to make the cool-whip. I made a double batch for this recipe. Put this in the refrigerator, while you continue on to the next step. (Like I said, this takes awhile to make, but it's totally worth it!)

Okay, it's FINALLY time to assemble your Chocolate Lasagna. Get out your oreos and crush them. I find that it works best to do this in the food processor, but you can put them in a bag and crush them with a rolling pin.

Add a little melted butter to the oreo crumbs and pour them in a 9"x13" casserole dish. Put the pan in the refrigerator for a few minutes, while you mix up the next layer. Cream one package of cream cheese and mix in 2 heaping cups of cool-whip. Spread this on top of the oreo layer in your casserole dish.

Pour the chocolate pudding over the cool-whip and put pan back in the refrigerator.(You're almost done!)

Leave it in refrigerator for about 10 minutes and then spread the rest of the cool-whip on the top. Drizzle some chocolate syrup over the top. Place the pan in the freezer for a few hours and then move to the refrigerator, if desired. If you would like it to be a frozen dessert, you can just leave it in the freezer until you are ready to eat it. I personally prefer it partially frozen, but either way is tasty!!
.JPG)
One final step - find yourself a bowl and dish up a piece. Enjoy!!
To begin this recipe you need to make a double batch of THM oreos. I used this recipe, but there may be other ones out there. Basically, you need around 36 oreos. You may have a few extras, which you can always eat. ;) I found that these oreos worked better for the Chocolate Lasagna if you make them a day or two in advance and put them in the refrigerator. They do work the same day though.
The next step is to make the pudding. I used the Choco Pudding recipe from the Trim Healthy Mama book and then added some chocolate syrup to it. Don't use the whole recipe for this part, just add some to taste. It makes the pudding a little more chocolatey than the original recipe.
While your pudding is in the refrigerator, you need to make the cool-whip. I made a double batch for this recipe. Put this in the refrigerator, while you continue on to the next step. (Like I said, this takes awhile to make, but it's totally worth it!)
Okay, it's FINALLY time to assemble your Chocolate Lasagna. Get out your oreos and crush them. I find that it works best to do this in the food processor, but you can put them in a bag and crush them with a rolling pin.
Add a little melted butter to the oreo crumbs and pour them in a 9"x13" casserole dish. Put the pan in the refrigerator for a few minutes, while you mix up the next layer. Cream one package of cream cheese and mix in 2 heaping cups of cool-whip. Spread this on top of the oreo layer in your casserole dish.
Pour the chocolate pudding over the cool-whip and put pan back in the refrigerator.(You're almost done!)
Leave it in refrigerator for about 10 minutes and then spread the rest of the cool-whip on the top. Drizzle some chocolate syrup over the top. Place the pan in the freezer for a few hours and then move to the refrigerator, if desired. If you would like it to be a frozen dessert, you can just leave it in the freezer until you are ready to eat it. I personally prefer it partially frozen, but either way is tasty!!
One final step - find yourself a bowl and dish up a piece. Enjoy!!
Monday, June 16, 2014
Dairy-free Basil Pesto
Here's a very tasty recipe for dairy-free basil pesto!!
Dairy-free Basil Pesto
- 6 cups fresh basil leaves
- 10 cloves garlic, peeled
- 3/4 cup olive oil
- 1/4 cup walnuts
- 1 1/2 tablespoons lemon juice
- 5 grinds of black pepper
- crushed red pepper, if desired
- Salt
Combine basil, nuts, garlic, salt and pepper in food processor and process while adding the olive oil in a steady stream. Stop the processor and scrape the sides if you need to. Process until everything is well combined and smooth.
Stir in the lemon juice and crushed red pepper.
Store in a clean container for a few days in the refrigerator. Freeze the extra for later use.
Subscribe to:
Posts (Atom)